Patient 11
Back To Smile Gallery Gallery
![Before Image]()
![After Image]()
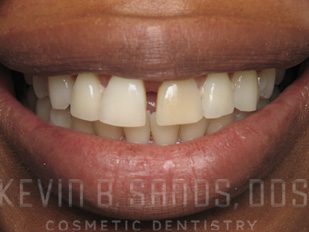
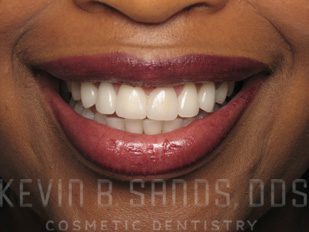
Description:
Kevin Sands DDS dramatically improved color, shape and closed large upper gap using porcelain veneers at his Beverly Hills, CA office.